Monday, 18 August 2014

Gluten Free Focaccia Bread

I haven't had much success with gluten free bread in the past until I tried this Gluten Free Focaccia Bread from 'This Gluten Free Life'.

Source

Gluten-free Focaccia 
Adapted from "1,000 Gluten-free Recipes" by Carol Fenster

Ingredients:
  • 1 1/2 tsp. active dry yeast
  • 2 tsp. sugar
  • 1/2 cup warm water (110 F)
  • White rice flour for dusting the pan
  • 1/2 cup sorghum flour
  • 1/2 cup tapioca starch
  • 1/2 cup potato starch
  • 1 1/2 tsp. xanthan gum
  • 1/2 tsp. salt
  • 2 large eggs, best at room temperature
  • 2 tbsp. extra-virgin olive oil
  • 1 tsp. cider vinegar

Directions:
  • In a small bowl or measuring cup, dissolve the yeast and sugar in the warm water.  Put it in a warm place to let rise and foam.
  • Grease an 8x8 nonstick pan and dust the bottom and sides lightly with white rice flour (or any gf blend you have).
  • Combine all of the dry ingredients in a mixing bowl and add the eggs, vinegar, oil, and yeast-water mixture.  
  • Beat the dough by hand or with a mixer on low until it is thoroughly blended.  If using a blender, increase the mixer speed to medium and continue beating for 30 seconds or until dough starts to get a bit thicker.  The dough will be very wet and will look more like muffin batter (you won't be able to knead it).
  • Transfer the dough to the pan.  Spread it to the edges of the pan with a wet spatula or spoon and make sure that it is evenly spread.  Let the dough rise in a warm place for at least 30 minutes, or until it has doubled in height.  If you are making herbed focaccia, spray dough with cooking spray and sprinkle the dough with rosemary and salt.
  • Preheat oven to 400 F.  When the dough has risen, place in the preheated oven and bake for 18 - 20 minutes.  It's done when you can push down on it and it springs back.  Remove from oven and cool the focaccia in the pan for 10 minutes on a wire rack.  Remove it from pan and cool another 10 minutes more on the wire rack.  Slice with a serrated knife.
  • Store in the fridge for up to one day and reheat when you are ready to serve it.  Otherwise, keep it in the freezer, already sliced, and defrost as needed.  

Sunday, 25 May 2014

Some New Recipes to Try...

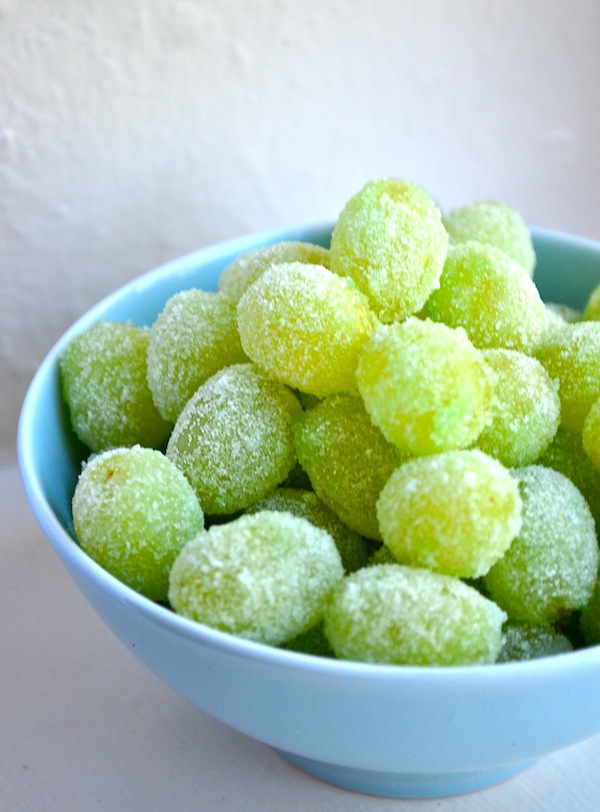
I spend a lot of time searching for recipes.  Here are some ones that I have found recently that have caught my eye and hope to try them soon. Click on the names to get to the website


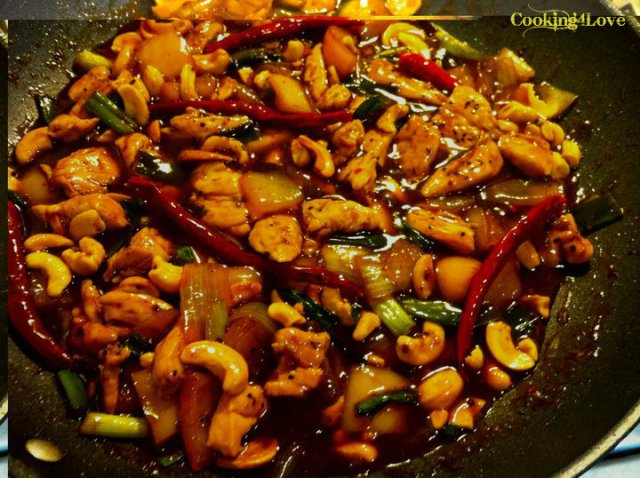
Thai Cashew Chicken (Gai Pad Med Ma-Muang)
Thai Cashew Chicken


Gluten Free Banana Bread | one bowl, simple ingredients, so moist, hearty and delicious
One Bowl Gluten Free Banana Bread

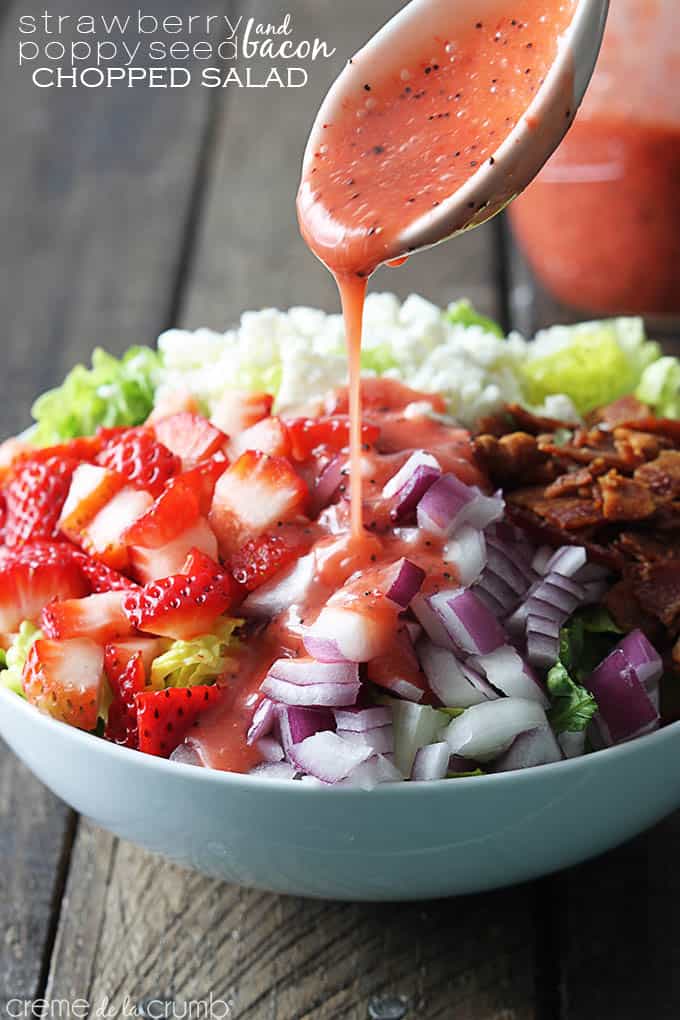
Strawberry Poppyseed & Bacon Chopped Salad
Strawberry and Poppyseed Bacon Salad

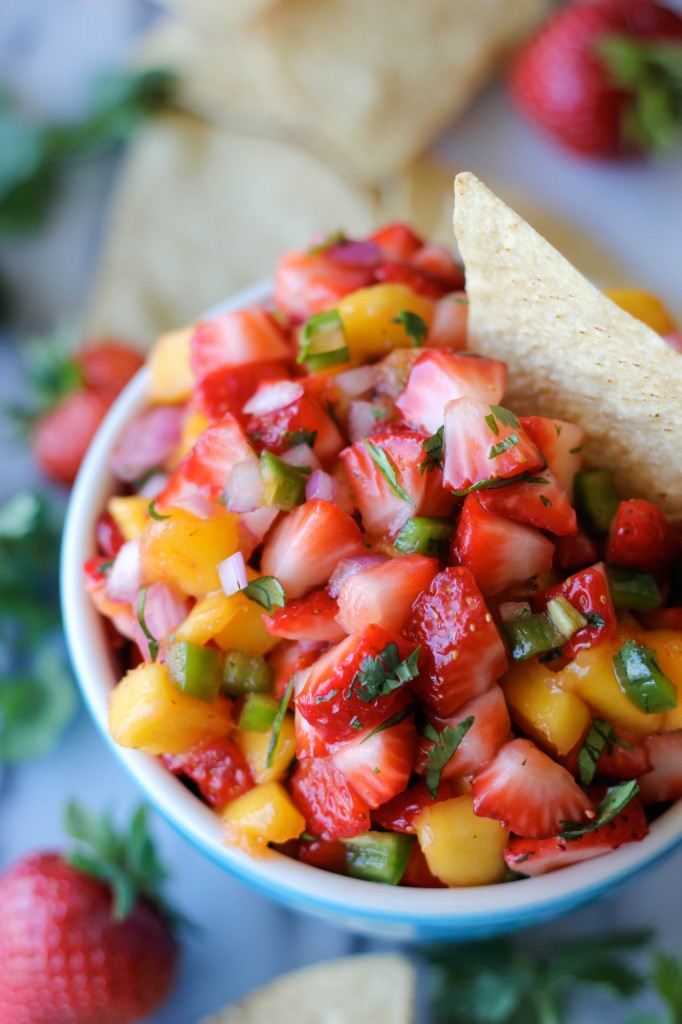
Strawberry Mango Salsa - The combination of sweet and spiciness is so good, you'll want to eat this with a spoon!
Strawberry Mango Salsa


Saturday, 1 February 2014

Apple Muffins

I found a delicious muffin recipe.  With a number of adaptations I think I have a really great, vegan and gluten-free muffin recipe on my hands here!

Source

Apple Muffins- makes 12
Strongly adapted from glutieandthebeast
  • 2 medium apples: peeled, cored, and cut into smallish chunks
  • 1 cup liquid sweetener* (1/2 cup honey + 1/2 cup Maple syrup)
  • 2 cups all-purpose gluten free flour
  • 1 teaspoon xantham gum(omit if your flour blend already had this)
  • 2 teaspoons baking soda
  • 1/2 teaspoon salt
  • 1/2 teaspoon ground cinnamon
  • Flax Gel** (5 tbsp ground flaxseed whisked into 7 tbsp warm water. let sit for 2 min)
  • 1 cup almond milk + 1tbsp Lemon Juice (let sit for 5 minutes)
  • 1/2 cup canola oil
Directions:
  1. Preheat oven to 400 degrees
  2. Spray a 12-cup muffin tin with cooking spray or line with silicone/paper cups; set aside
  3. Before you mix your ingredients, prepare you apples, flax gel and almond milk. 
  4. In a bowl, whisk together flour, xantham gun, baking soda, salt & cinnamon
  5. Toss in prepared apples
  6.  In a separate bowl mix in liquid sweetener, almond milk, flax gel, and canola oil
  7. Fold in wet mixture into dry then pour into prepared muffin tin
  8. If desired, sprinkle tops of muffins with sugar
  9. Bake for about 18 minutes, until a toothpick comes out clean
  10. Let cool then enjoy!  Store in an airtight container or freeze

Notes:
* Liquid sweetener can be substituted for 1 cup white sugar
** Flax gel can be substituted for 2 eggs
** Flax gel above is for 2 eggs.  In other recipes, if you only need 1 egg use 2.5 tbsp of flaxseed and 3 tbsp warm water. 


No-Bake Chocolate Granola Bars


I recently went away and experienced my usual 'what will I eat' panic.   In search of a snack, I checked out Pinterest and found my new favorite treat.  

It turned out that I didn't need to panic because Camp Kawkawa did an amazing job providing substitutions for those of us who had dietary concerns.


On the other hand I am thankful for the panic because these were amazing!  They are also vegan and gluten free! Hooray!


No-Bake Chocolate Granola Bars- serves 12 
Gluten free & Vegan
Adapted from Sally's Baking Addiction. Check out her website for some pictures and other combinations!

 Ingredients:

  • 1/3 cup coconut oil
  • 1/2 cup dark chocolate chips
  • 1/2 cup creamy peanut butter
  • 1/3 cup honey
  • 1 and 1/4 cups gluten free* oats
  • 3/4 cup gluten free* Rice Krispies
  • 1/2 cup salted peanuts
  • 1/4 cup mini chocolate chips
  • Extra peanuts and chocolate chips to sprinkle on top

Directions:

  1. Spray a 9-inch square baking pan with cooking spray** and line with parchment paper. Set aside.
  2. Over low heat, melt the coconut oil and chocolate chips in a medium pot.  Stir in peanut butter and honey.  Remove pot from heat. 
  3. Mix in the oats, Rice Krispies, peanuts and chocolate chips. Press mixture into prepared baking pan. 
  4. Top with mini chocolate chips and peanuts.
  5. Put in fridge until set, 2+ hours.  Cut into squares and store in an airtight container.  
Notes:
* Of course, if you do eat gluten just use regular oats and Rice Krispies
** I use cooking spray because it helps the parchment paper stick to the pan.


Saturday, 12 October 2013

Fall Soup!

I love the fall!!  I love the crispness of the air, the color of the trees and the fall vegetables.


While at the market one day I found some lovely butternut and acorn squash and to my surprise they made a delicious soup! 

Oprah’s Butternut Squash Soup photo
Image Source


I got this recipe for Oprah's Butternut Squash Soup from tastebook.com but adjusted a few things to meet my tastes and my dietary needs.  For the original recipe go here.

Here's my version of the recipe so you can try it too!

Squash Soup serves 4 
recipe adapted from www.tastebook.com

Ingredients
  • 1 medium butternut squash & 1 medium acorn squash (about 1-2 pounds each)
  • 1 tablespoon olive oil
  • 1 yellow or red onion , sliced
  • 1 stalk celery , sliced
  • 1 carrot , sliced
  • 1 teaspoon fresh or dried rosemary leaves
  • 2 cups chicken or vegetable stock
  • 1 can light coconut milk
  • 1 1/2 teaspoons kosher salt
  • 1/4 teaspoon freshly ground pepper
Directions
  1. Peel squash and remove seeds. Cut into chunks and set aside.
  2. Add oil to a 4-quart pot and place over medium heat. Add onion, celery, carrot, and rosemary, and cook until onion begins to brown, stirring occasionally, about 15 minutes.
  3. Add squash, stock, and 1.5 cups water. Bring to a boil, then reduce to a simmer and cook until squash is tender, about 15 minutes. Turn off heat and let soup cool slightly, about 8 minutes.
  4. Using a standard or immersion blender, puree soup until smooth. If using a standard blender, puree in small batches to prevent spillage
  5. Add coconut milk, salt & pepper to soup.  Serve immediately or store in containers (I prefer 500ml canning jars).  


Saturday, 27 July 2013

Who Says??

Whoever said you can't eat delicious things when avoiding dairy, wheat, gluten and eggs was wrong!  


I promise I will post soon and tell you just what I did.  


Tuesday, 4 June 2013

Hot and Sweet Pepper Curry

I love curry!  It is so easy to make gluten and dairy free without anyone being the wiser.  It is also flavorful and delicious. 

And thanks to Racheal Ray, I have another great Curry recipe to share.


It was so very good and we ate it so fast that I forgot to take a picture.  So instead, you get the leftovers picture.

Hot and Sweet Pepper Curry Sauce- Serves 4
adapted from The Food Network

Ingredients
  • 3 tablespoons vegetable oil
  • 1 tablespoon ground coriander
  • 1 tablespoon ground cumin or cumin seed
  • 2 teaspoons turmeric
  • 2 cardamom pods, split, or 1/8 teaspoon ground cardamom
  • 4 cloves garlic, thinly sliced or chopped
  • 2 sweet red bell peppers, seeded and chopped
  • 1/3-1/2 red hot chile pepper (more if you like it spicy- 1/3 added flavor but no spice)
  • One 1-inch piece ginger root, grated
  • 1 onion, finely chopped
  • Salt and freshly ground black pepper
  • 2 cups tomato sauce
  • 1 cup chicken broth
  • 1/2 cup mango chutney- I made my own
  • 1 large bay lea, dried
  • 1 tsp of cinnamon (or a cinnamon stick)
  • One 15-ounce can diced tomatoes
  • 1-2 chicken breasts, cubed into bite-size pieces
  • 1-2 limes, juiced
  • 1 teaspoon sweet paprika
Directions
  1. Marinate the meat sprinkled with salt, pepper and paprika in the lime juice for 1 hour.
  2. Heat the oil in a Dutch oven or large pot, then add the coriander, cumin, turmeric and cardamom and stir until very fragrant, 1 minute. Next add the garlic, sweet and hot peppers, ginger, onions and some salt and pepper. Soften for 5 minutes partially covered, and then add the tomato sauce, stock, chutney, bay leaf, cinnamon (stick) and diced tomatoes. Simmer over low heat, about 1 hour. Remove the bay and cinnamon.
  3. Add the marinated meat to the sauce and simmer to tender. Serve, or cool and store in the refrigerator or freezer for a make-ahead meal.
  4. Serve the curry with naan bread and/or over jasmine rice with a dollop of yogurt for mixing in. Garnish with cilantro and scallion slices.


Friday, 19 April 2013

Eating like a Kid again

I consider myself a professional adapter.  As I work with students in need of adaptations, I am continually looking at a material and changing it to meet the needs of my students. 
 
So it comes naturally to me when it comes to changing food to meet my needs.  I am also stubborn, and when I stopped eating wheat and dairy I vowed to figure out ways to eat the same type of food.  I am well on my way to success.

I have done this with pizza, meatballs, cookies, and pasta.  And now, I have figured out how I can eat grilled cheese.


It's easy:
I used three ingredients:
  1. Daiya Cheese
  2. Udi's Gluten Free bread
  3. Earth Balance
Paired with some Trader Joe's Organic Ketchup, I finally got to enjoy grilled cheese again.

Tuesday, 16 April 2013

Got the Munchies?


Over spring break I went to the library and took out a dozen cookbooks. I finally had a chance to look through them and am happy to report that I found a few recipes that look great.

I tried this one and it proved to be a great snack!

Spiced Pecan-Cherry Crunch Mix Recipe
Spiced-Cherry Crunch Mix from Cooking Light Gluten Free Cookbook
I changed it up a bit and am pretty happy about it.  In fact, I am eating the rest of the batch as I type this.  Both sweet and salty; it hits the spot.

I have adapted the recipe and will share with you what I did:

Snack Mix
Adapted from Cooking Light Gluten Free Cookbook

Ingredients:
  • 1 large egg white
  • 1/4 cup sugar *
  • 1 1/2 tsp ground cinnamon
  • 1/4 tsp ground nutmeg
  • 2 cups gluten free rice krispies**
  • 1/3 cup chopped almonds***
  • 1/3 cup chopped walnuts (toasted)
  • 1/3 cup dried cranberries
  • 1 tsp grated orange rind****
Directions :
  1. Preheat the oven to 300 degrees
  2. Line a cookie sheet with tinfoil and coat with cooking spray
  3. In a medium bowl, beat egg white with a mixer until foamy
  4. Combine sugar, cinnamon, and nutmeg, in a separate bowl.  Add sugar mixture to beaten egg white, 1 tbsp at a time beating until stiff peaks form
  5. Fold in cereal as well as next 3 ingredients.  
  6. Spread mixture on cookie sheets and bake for 20 minutes, stirring after 10 minutes.
  7. Cool completely in pan on a wire rack and store in a airtight container.

Notes:
* Next time I am going to try 1/8th cup of sugar or try to omit completely
** Don't want it to be gluten free? just use regular rice krispies or be adventurous and use your favorite cereal.
*** I might try to toast the almonds next time too, I love that taste
**** I learned that I really don't enjoy orange flavor, so I will omit the orange rind.


Saturday, 13 April 2013

Breakfast Ideas

Let me begin by saying that I am not a breakfast person.  I didn't even start eating breakfast until I was into my twenties.  I know the importance of eating breakfast, so now I eat it everyday but it definitively lacks creativity, probably because I am still half asleep.  I tend to be a repetitive eater, so this months' breakfast is a banana, a handful of nuts and a muffin.  I also really enjoy pancakes, but those usually make a dinner appearance.

Some of the ladies that I work with love breakfast.  They frequently have conversations about all of the wonderful things that they make...I guess I am just not that creative in the morning.  I am a willing recipient though, so feel free to cook breakfast for me anytime.  Next to pancakes, hash browns and eggs are my favorite. 

I have been asked for some potluck gluten free breakfast ideas...thanks to pinterest I found some that look great. 

Breakfast.
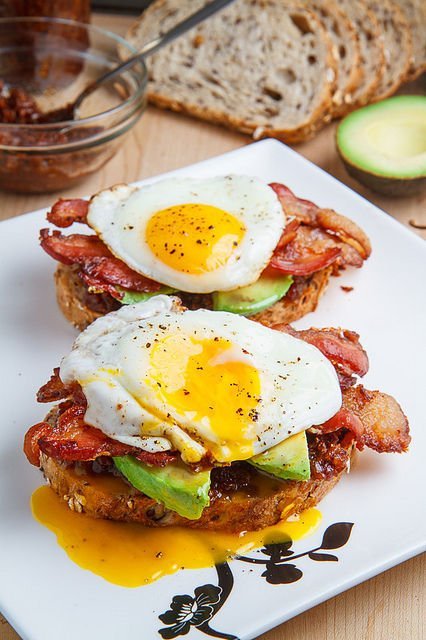
The Obvious: Bacon and Eggs (with gluten free bread)
source
Gluten Free Pancakes- the best I've ever had

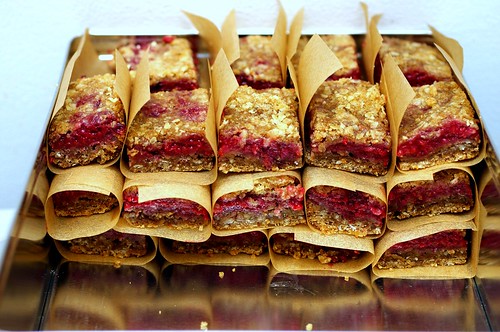
raspberry breakfast bars
Raspberry Breakfast Bars
from Smitten Kitchen


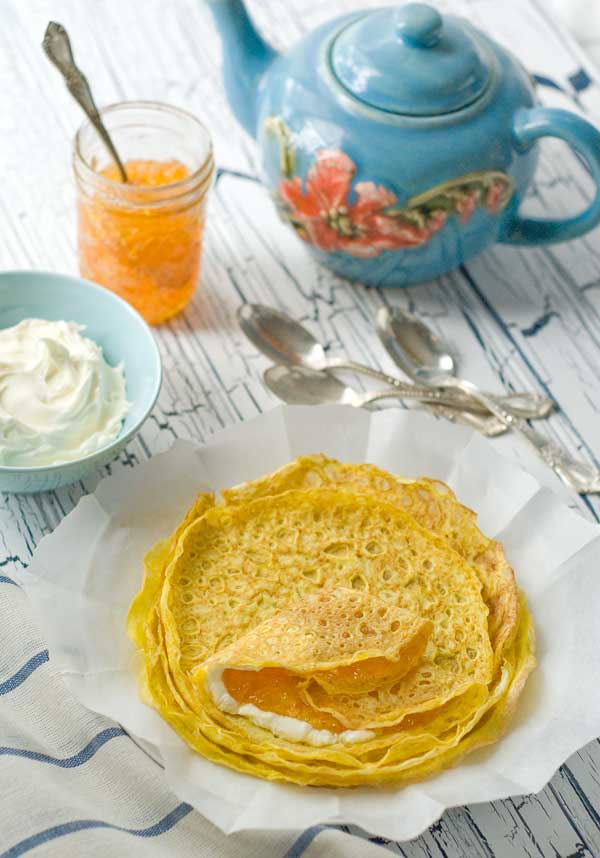
Gluten Free Recipes Egg Crepes
Gluten Free Egg Crepes
from Simply Gluten Free


Breakfast Cookies from Make or Die

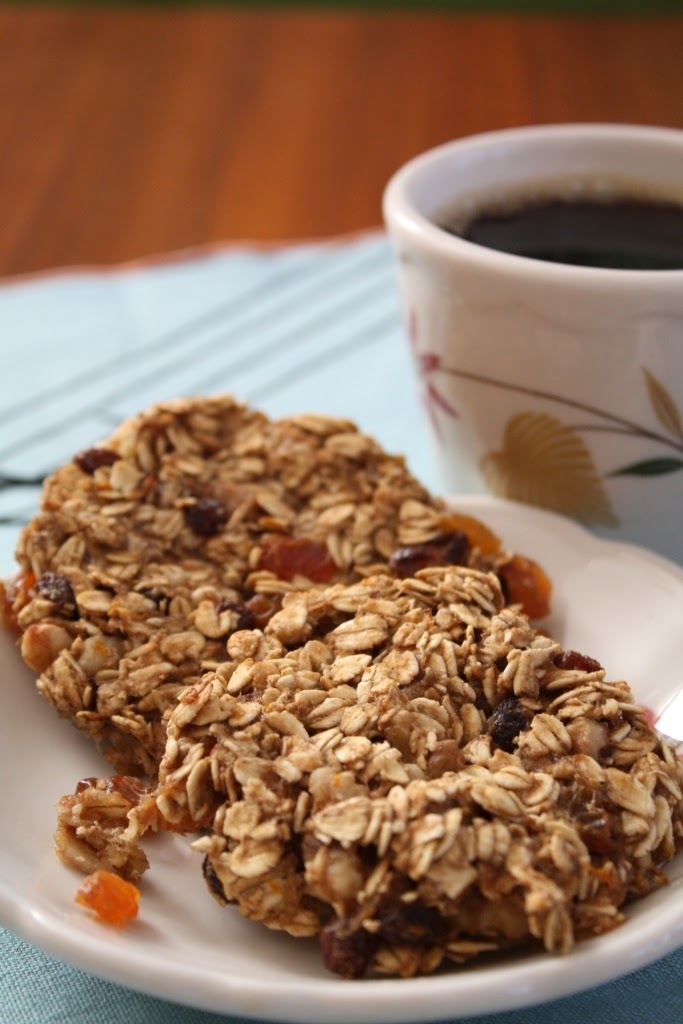
Gluten and Dairy Free Breakfast Bars
 from the Bonjon Gourmet
Apple & Carrot Gluten Free Breakfast Cake 
Apple and Carrot Gluten Free Breakfast Cake
from simplysugarandglutenfree.com


Tuesday, 9 April 2013

Dutch Apple Cake

Banana Loaf is a staple in our house.  While it is pretty amazing, I get bored of it.  Now let me clarify, I don't eat it.  I guess I just get bored of watching Dan eat the same thing for the last five years. 


Good news! I don't have to be bored anymore- I found the Dutch Apple Walnut Loaf. And I love it!

Dutch apple walnut loaf
source


The best part is that my critics love it too and didn't even know I made it gluten free.

I adapted the original recipe to make it gluten free, dairy free, as well as to have a little of my own personal touch.  You can find the original here.


This is what mine looks like...I so badly wanted to pick at the topping!

Dutch Apple Walnut Loaf- makes 1 large loaf
Adapted from Carina-Forum
 
Before you begin:
- get 1/2 cup chopped walnuts in the oven for toasting.
- Then preheat oven to 350 degrees.
Topping
  • 1/4 cup brown sugar
  • 1/4 cup gluten-free flour
  • 2 teaspoons cinnamon
  • 1/4 cup dairy-free butter (such as Earth Balance)
In a medium bowl, whisk together the sugar, flour and cinnamon. Cut in the cold butter until the mixture becomes crumbly. Set aside. 

Loaf
  • 1/2 cup dairy-free butter softened
  • 1 cup white sugar
  • 2 eggs
  • 1/4 cup dairy-free milk (almond or rice)
  • 1 teaspoon vanilla
  • 2 cups gluten-free flour
  • 1 tsp xanthan gum
  • 1 teaspoon baking soda
  • 1/2 tsp cinnamon
  • 1/2 teaspoon salt
  • 1 apple, peeled, cored, & diced
  • 1/2 cup chopped toasted walnuts
Directions:
  1. Grease a baking dish. Line the base of the dish with parchment paper, then grease the top of the parchment paper.
  2. In the bowl of a stand mixer, or in a large bowl using an electric mixer, cream together the butter and sugar until light and fluffy, 3 to 5 minutes. Add the eggs, one at a time, beating well until fully incorporated. Beat in the milk and vanilla.
  3. In a medium bowl, whisk together the flour, baking soda and salt. With the mixer running, slowly beat in the dry ingredients just until fully combined. Stir in the diced apples and chopped walnuts by hand.
  4. Pour the batter into the prepared dish, and sprinkle over the topping.
  5. Place the dish in the oven and bake until puffed and a toothpick inserted comes out clean, about 55 minutes to an hour. Cool the dish on a rack for 15 minutes, remove from pan and cool completely before slicing.
Trust me, this is a must try!

Friday, 5 April 2013

Where there is a will, there is a way.


Since I stopped eating wheat, dairy, and beef, I have not enjoyed a good solid burger.  Thankfully for me, I really like chicken and can do without the cheese. The problem I ran into when going to restaurants is that they wanted to give me iceberg lettuce to wrap my burger in instead of a bun.
This just shouldn't be eaten ever, especially around a burger.

Iceberg Lettuce??? Eww.  I have never opted for lettuce.  This summer I was introduced to the rice bun.  I was pleasantly surprised when I discovered that it was actually pretty good.  At camp, I had my fair share of veggie patties on a rice bun, but it still didn't hit the spot.

On a recent date my husband brought me out to White Spot.  I had been craving a restaurant burger so badly, so those that know me won't be surprised when I tell you that I brought my own bun*.  White Spot actually has a great gluten free menu, but I just really wanted a burger, hence my creativity.  They couldn't bring my bun into the kitchen, but they did bring burger minus the bun out to me.  This worked just fine, and let me tell you, it was well worth the two year wait.

*I have a reputation of being very resourceful.  This includes bringing a variety of items to restaurants with me, including my own salad dressing, buns and condiments.

where there is a will, there is a way.

 If you don't mind being a little embarrassed and your sensitivities will allow, it is worth a try!


Tuesday, 2 April 2013

What will go in your Megalunch? Part 2

So I must confess, I expected to do a lot more blogging during my spring break.  I cooked lots even took a number of pictures, but time just flew!  It's time to get disciplined again.

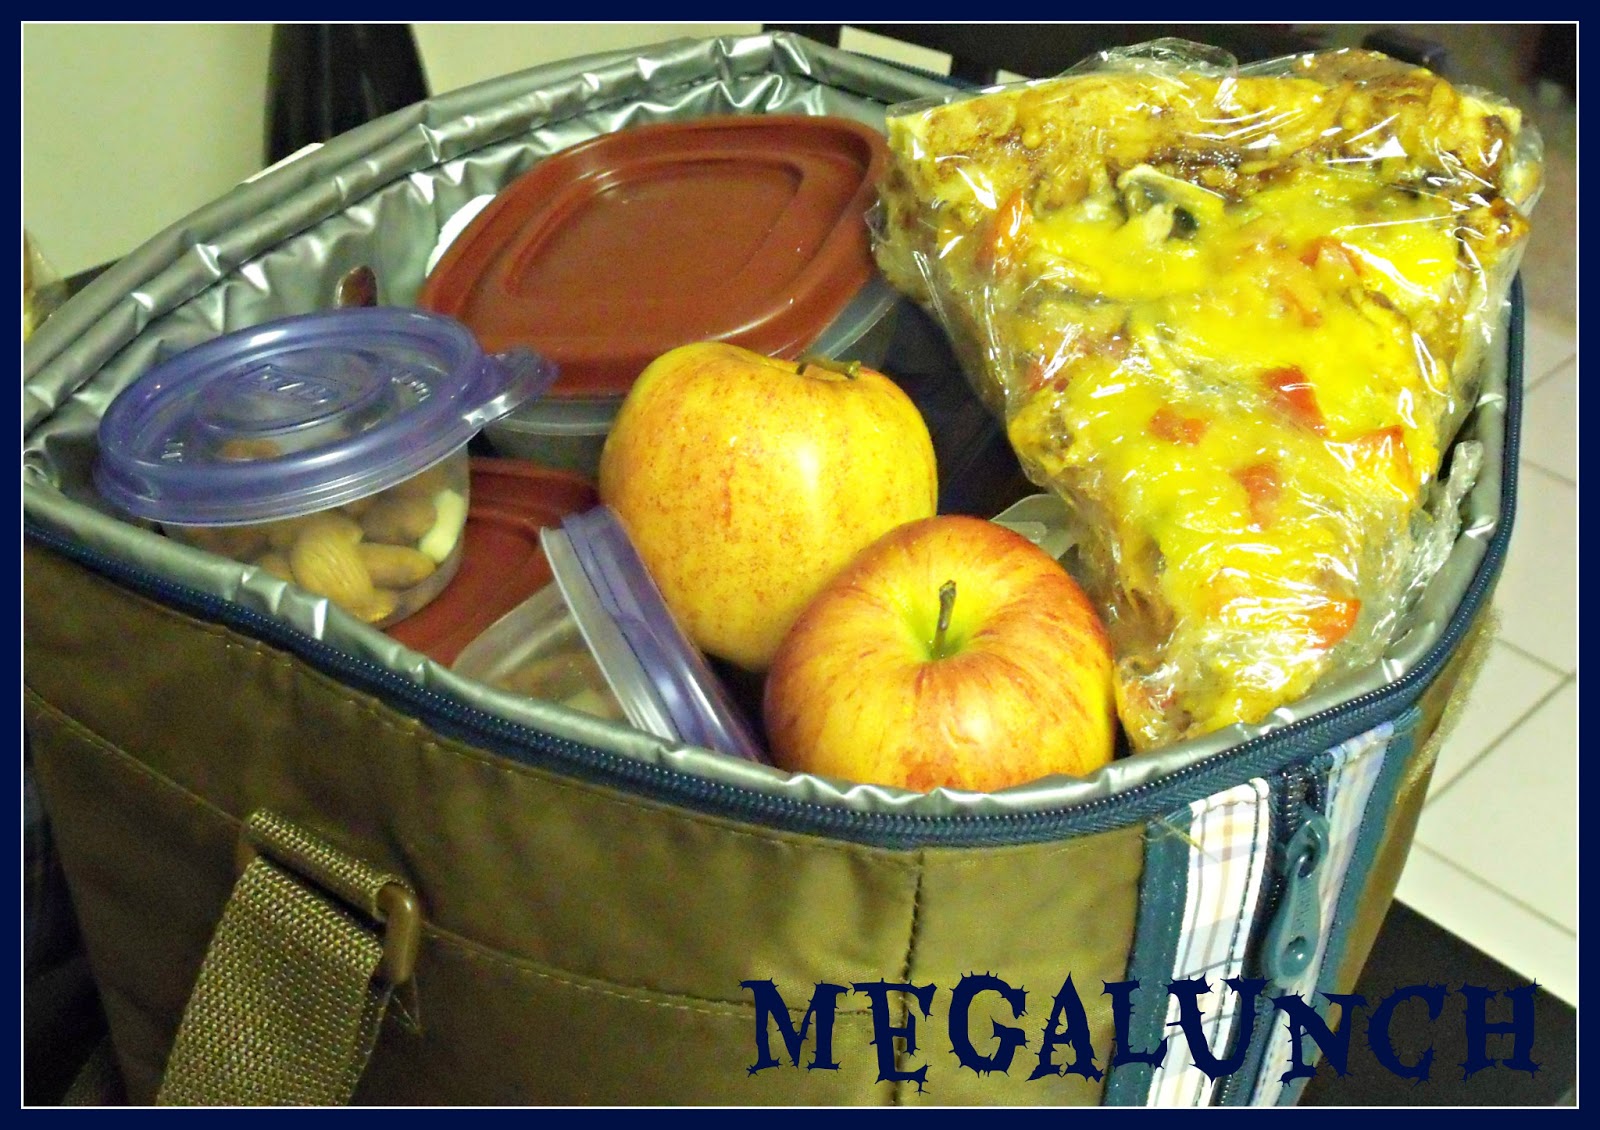
Last week, I introduced you to the megalunch.  This thing makes a weekly appearance in our house, in fact I made another one last night.  If I didn't pre-make food, I am certain Dan would either live on peanut butter sandwiches and chips or he would be eating out every day.  Neither are good options for us, so instead, I schedule in soup making sprees when I can.


The Megalunch.


Another confession, I don't have that many soup recipes.  Dan has been happy to eat the same few over and over.  And while I have tried new ones, they don't always work out , so I don't experiment with soups very often.

If you have a favorite soup recipe, please pass it on, even it if has wheat and dairy in it (Dan can still eat it).
You can comment or email me  I'd love hear from you!


Because I had some free time I tried something new. Actually two new things and a usual.
1. I put Kale in our Quinoa Minestrone.  Not bad, but neither Dan or I enjoy greens in our soup, so while we will finish the batch I don't think Kale will ever make it in a soup again.

2. I tried a new vegetable soup with Quinoa Pasta.  The Quinoa pasta was good immediately after cooking itHowever, after having one from the freezer I have decided to not put quinoa pasta in soup again.  I find that it gets too gritty.  I LOVE quinoa pasta, but I love it in pasta form, not in soups.  

3. I made an old fashioned Chicken Soup for Dan.  This is pretty basic and I know there are a million ways to make it...let me tell you what I did:

Chicken Soup Recipe* 

In a large pot, combine:
  • 2 cartons of Knorr Chicken Broth
  • 3 or so celery sticks, chopped
  • 3 or so carrot sticks, chopped
  • all purpose spice such as Mrs. Dash or Trader Joe's Everyday Seasoning, to taste
  • 1 cooked chicken breast, sliced and cooked in all purpose spice
  • salt & Pepper to taste 
  • 1/3 cup rice or two handfuls of spaghetti noodles, broken into small pieces

Bring to a boil and simmer until vegetables and rice/pasta is soft.

Note:
* I don't follow a recipe, I eye my ingredients and taste as I go along.  So do the same, because I can't promise my measurements are the same.


Tuesday, 26 March 2013

What will go in your Megalunch? Part 1

I am currently in week 2 of Spring Break.  So far it has been great- I can't say I have done too much other than catch up on life and sleep as well as some homework that I was falling behind on.

One of the 'life things' I had to catch up on was cooking.  I cooked and baked to my heart's content- it was lovely.

I like to fill our freezer with soups, sweets, and dinners so when life gets hectic we have ready made food for lunch and dinner. It also helps us save a load of money from not eating out because we usually have things in the freezer.

This is what I called organized chaos...don't judge me, ok!

Right now, I don't have kids and this is totally doable...we'll see if this is still the case in a few years.

This week's agenda includes: meatballs, pizza, and perogies.  There is also a family birthday coming up, so I am going to give my ice cream cake another try.

Today I share with you about my favorite cookie trick...who doesn't love cookies?

Dan loves cookies!  Who am I kidding...I love them too! But Dan loves the ones made with wheat.  And though we occasionally have a bag of cookies in the house, I try to entice him with homemade cookies because they are healthier and cheaper (I'd like to think so at least!).


I adore fresh baked, out of the oven, warm cookies.  So, I have a little trick when it comes to cookies...I make them and roll them, but instead of putting them in the oven I put them in the freezer.  When frozen, I throw them in a container and pull them out whenever we want to serve fresh baked cookies to our guests or to ourselves.

I will also bake up some cookies, as well as loaves, wrap them individually in plastic wrap and toss them in the freezer.  When it is time to make Dan's megalunch*, he has baked goods to tie him over for a few days.


*Dan is away a couple of days every week for school.  To help our budget, he has agreed to rarely eat out.  In return he brings a megalunch, consisting of 2 breakfasts, 2 lunches, snacks galore, and a dinner. It is huge.  Having ready to go freezer soups and snacks makes this doable.


Now what would a blog post be without a recipe, so here are the recipes that I used this week**. 


Notes:
**I made these for Dan, so I used white flour and omitted the xanthan gum.  They turned out great!
*** I adapted the dutch apple loaf, but will share about those next week- it was so good that it deserves it's own post.

Friday, 22 March 2013

Free Chicken Nuggets

My favorite meal of all time is chicken nuggets. 


I grew up eating the ones you buy from the grocery store and occasionally enjoyed the fast food version.  Then I got married.  It didn't work for us to go to the drive thru every time I had a craving and I was determined to not buy processed food- so I learned to make my own.   

I have tried a number of recipes, all which disappointed and then I found it.  I found a chicken nugget recipe that inspired me to make my own version.  

I am confident that I will be feeding my version to my grandchildren one day.  

It is fast and easy and in fact, my husband is usually the one to make it!

If you haven't tried this recipe already, give it a try.  I promise you won't be disappointed...unless you use vanilla flavored Rice Krispies.  
 
Gluten Free Chicken Nuggets*, feeds 4

Ingredients:

  • 2 Chicken breasts
  • 1/3 cup olive oil (+ extra on hand if you run out)
  • 3-4 cups gluten free Rice Krispies, crushed**
  • 3 tbsp of gluten free flour

Directions:
  1. Preheat oven to 375 degrees.
  2. Spray cookie sheet with cooking spray or line with parchment paper.
  3. Crush rice krispies (by hand or with food processor) and add flour.  Put in bowl and set aside.
  4. Cut defrosted chicken into chunks/strips and put on plate.
  5. Pour olive oil in a bowl
  6. Begin an assembly line until all of the chicken has been used   
    • dip chicken in olive oil
    • dip chicken in Rice Krispie mixture
    • put on pan  
    7. Sprinkle/drizzle any leftover krispies/oil over top.
    8. Bake in the oven until the meat is white in  the center (about 30 minutes).  Flip half way
      through.
Easy Peasy!
Notes: 
*Don't be fooled by the Gluten Free aspect.  A) they are still delicious...like actually and B) use regular Rice Krispies and white flour and you are able to have gluten.

** I keep a jar of crushed Rice Krispies on handWhen it is low, I use my blender and make some more


Monday, 18 March 2013

Good Enough for the White House

Hello again!  Where did I go you ask?  Well, nowhere.

But you know those times when life is really overwhelming, the house is a constant disaster, and you are thankful for frozen leftovers because you don't have time to cook.  Yeah, that pretty much where I was...

Good news though, I just finished writing a final exam last night and think life might be a little more manageable again. So now that I have rediscovered what it is like to have some spare time, I get to cook and bake again. Yay!!

I have had my eye on this 'Biggest Loser' Salad that was served at the White House for some time now...


So along with a really delicious sandwich (which I will tell you all about in a minute), we had dinner.


Sorry for the half eaten sandwich...I have to remember to take pictures before I eat!

If you were to ask me a year ago if I thought I could ever have a sandwich again, I would have given a very confident NO!

Ask me now and you'll get a YES! paired with a big smile.  What makes this possible?  My gluten-free buns from Udi's and deli meat from May Family Farms which have g-free ingredients- both purchased at Save-On Foods. Tonight I added some bacon, spinach, and avocado and had one of the best sandwiches I have ever made.

Correction: I am taking all of the credit, the sandwich was actually 100% my husband's doing and it was so good!

The salad was simple to make and delicious.  I can get the credit for this part.  I do however regret the fact that I had to use tomatoes from Mexico, instead of a fresh, local ones.  But nonetheless, it was still really great!  My anti-tomato and onion husband even liked it...in fact he said "I am getting skinnier with every bite".  I don't know if that was actually true. 

Here is the recipe * (with my adaptations)- Serves 2
  • 3 handfuls of baby spinach, big pieces ripped in half
  • 1/2 cucumber cut in quarters
  • 1 Roma tomato, cut into chunks
  • Red onion (I used a very small amount..it's so strong!)
  • A bunch of basil leaves cut up
Dressing**- mix together:
  • 1/3 cup olive oil
  • 3 tbsp lemon
  • 1 tsp honey
  • salt and pepper to taste
Notes:
*I measured my ingredients based on how much I like them...for the actual proportions, check out the recipe here.
**I didn't add the dressing until I was ready to serve.  Instead I made each part individually and refrigerated both until I was ready to serve.